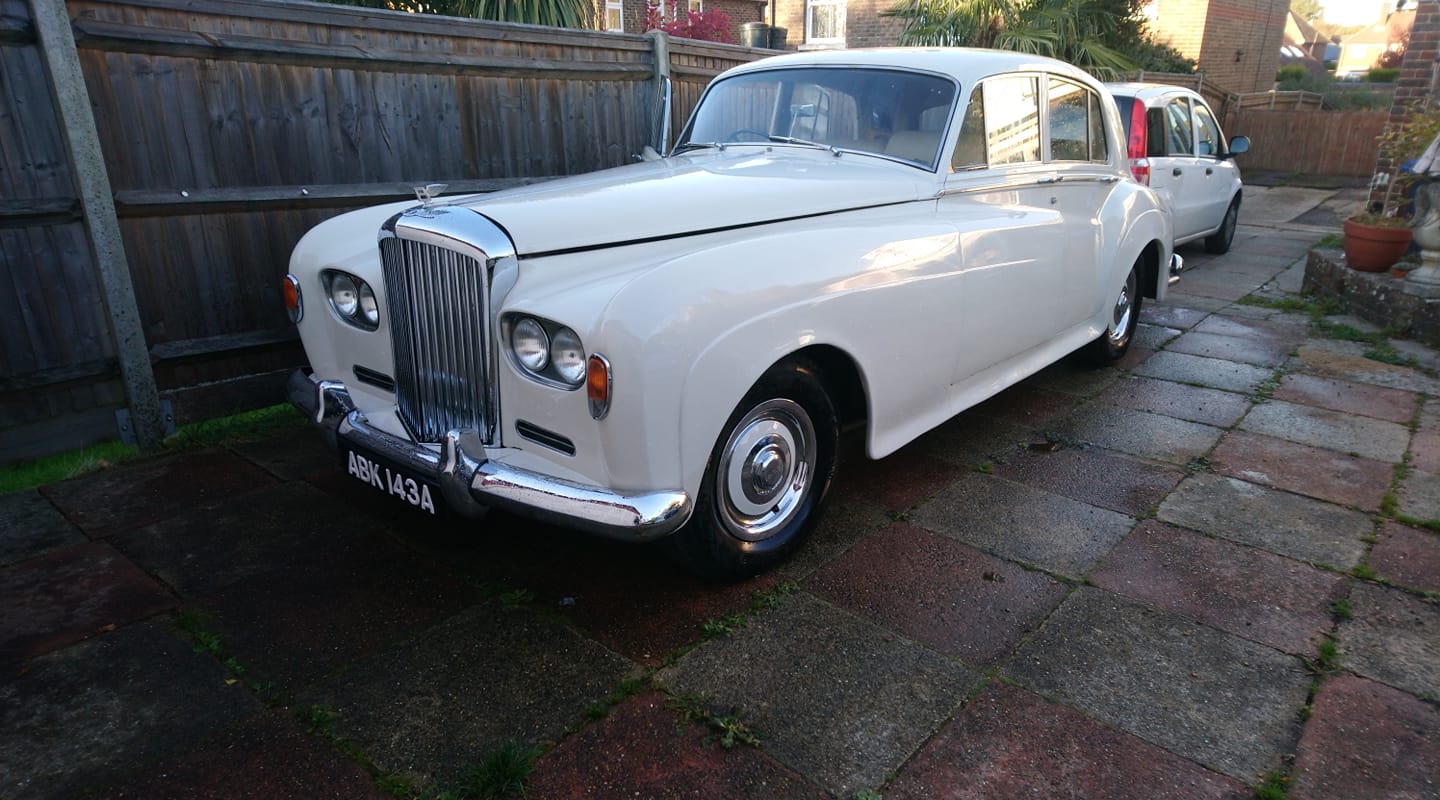
In our global role of supporting Rolls-Royce and Bentley owners, we are dedicated to keeping these pieces of history where they should be, on the road. We take great pride in supporting customers who are passionate about restoring their vehicles. One of our valued customers embarked on a restoration project for their cherished Bentley S3, which they had originally purchased from us in 2018 as a rolling restoration.
We wanted to dig deeper and explore the journey of this ongoing restoration project, highlighting the challenges our customer faced and the solutions we provided/provide to bring this magnificent car back to its former glory.
Customer Journey:
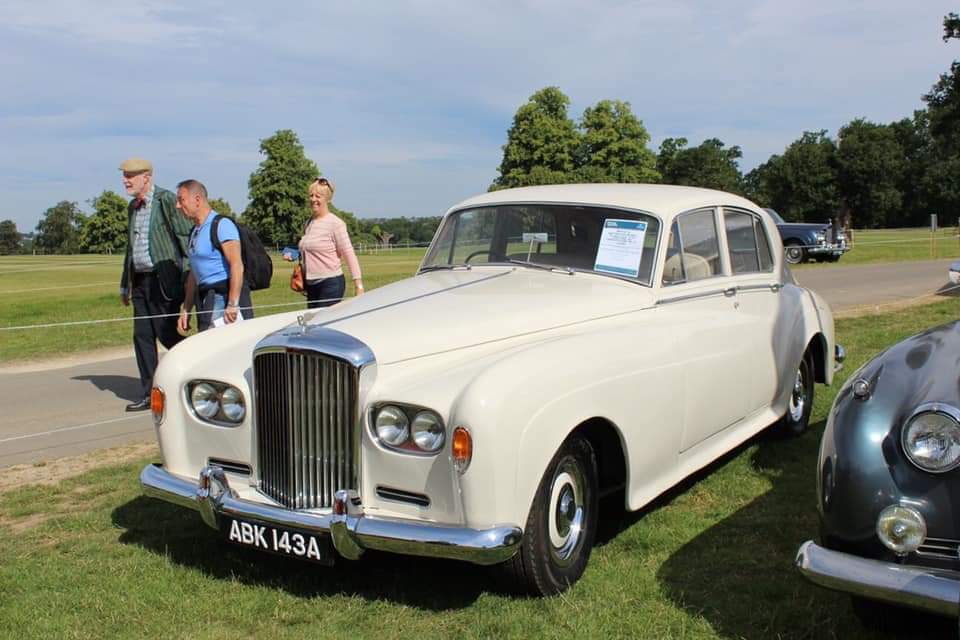
"I First saw B6AV (ABK 143 A) on the Flying Spares stand at the 2018 Rolls Royce Enthusiasts Club Annual Rally at Burghley House, in Stamford Lincolnshire. I did not purchase at the time as I was more interested in a Rolls Royce Silver Cloud they had there, but it turned out to be unsuitable for me and the S3 was suggested instead.
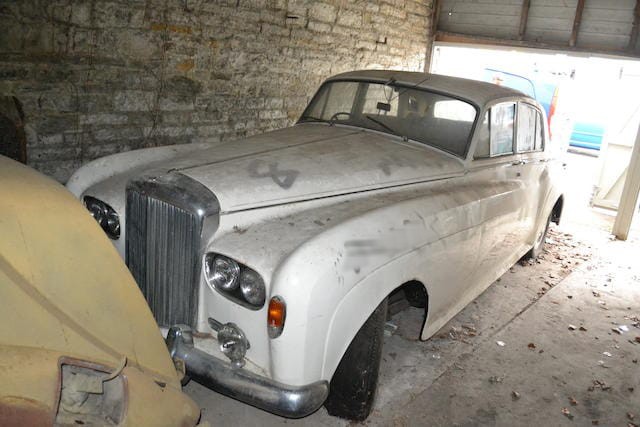
When I purchased it, I was hoping to quickly do the necessary work listed on the M.O.T. fail sheet, and have it on the road the following year, but as we all know these things never work out as planned and take twice as long.
The car had multiple issues, including incorrect offside headlamp aim, insecure battery, non-operational windscreen wiper and registration plate lamp, missing central obligatory mirror, excessive steering wheel play, binding offside rear brake, worn out-suspension arms, faulty parking brake, leaking exhaust, and broken indicator switch. Other issues also surfaced during the project.
I started with the front suspension and brakes, both fulcrum brackets, all fulcrum pins, bushes, and seals were replaced. The brake cylinders were stripped and cleaned, then rebuilt with new seals, all parts being re-used were cleaned and painted black, the suspension was then reassembled followed by the brakes using the rebuilt cylinders, new springs. The brake shoes were not even worn in, so were refitted along with new hoses and copper pipes.
The chassis was cleaned and painted and the underside of the body also cleaned and undersealed (Schulz) as I worked to the back of the car.
Next, the rear brakes were dismantled, the brake cylinders were now known to be seized. Grease was pumped into them which pushed the pistons out on inspection (a stroke of luck the bores were not damaged), so were cleaned and rebuilt with new seals, again every part being reused was cleaned and painted black before being reassembled.
It was at this point I decided to have a look at a rust patch in the boot to the right of the spare wheel opening. It turned out the body mount attached to the other side was rusting through, at this point it snowballed from here.
I noticed that the body mount just behind the rear wheel also on the right-hand side was also rusty and, as I was repairing one, I might as well do both. At the same time, I noticed that previous welding was not of a very tidy, on cleaning it up it was found to be plated over the old rusty panels and as I was going to do this, I might as well do the inner rear wing panel as this had also been patched in the past when this was cut out.
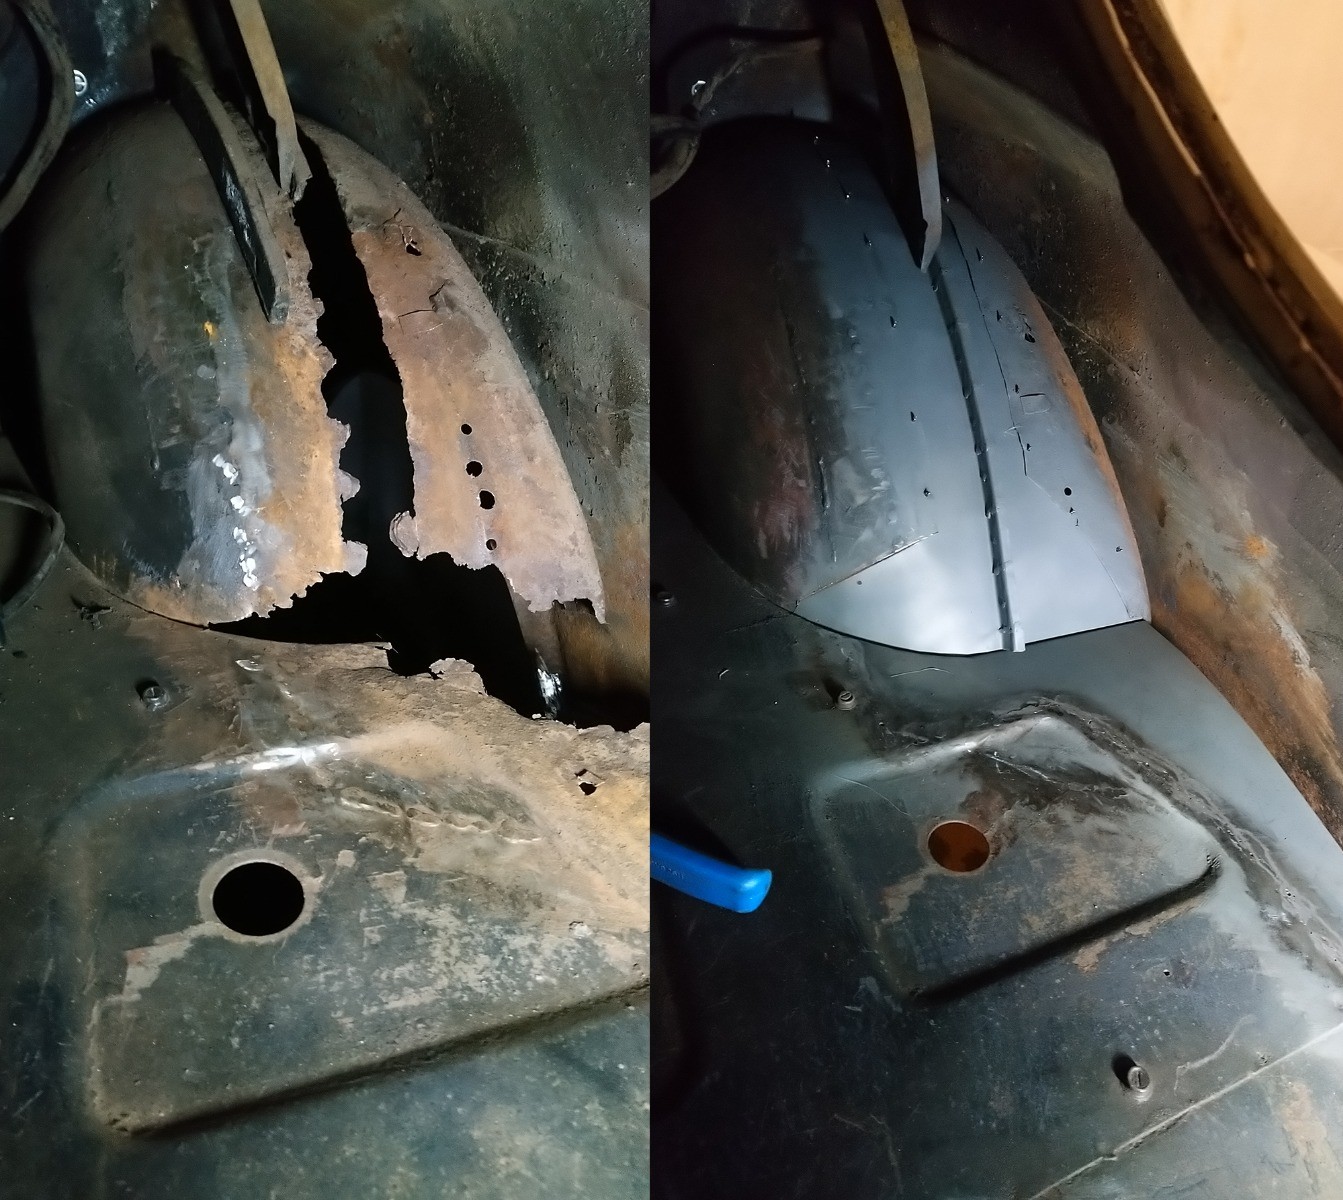
It became clear the lower part of the rear wing was not repaired to my standard and it ended up with that being replaced as well and the rearmost end of the sill while I was there (I did say it snowballed) eventually the welding on this side was finished so I had to wait for some good weather to be able to spray it.
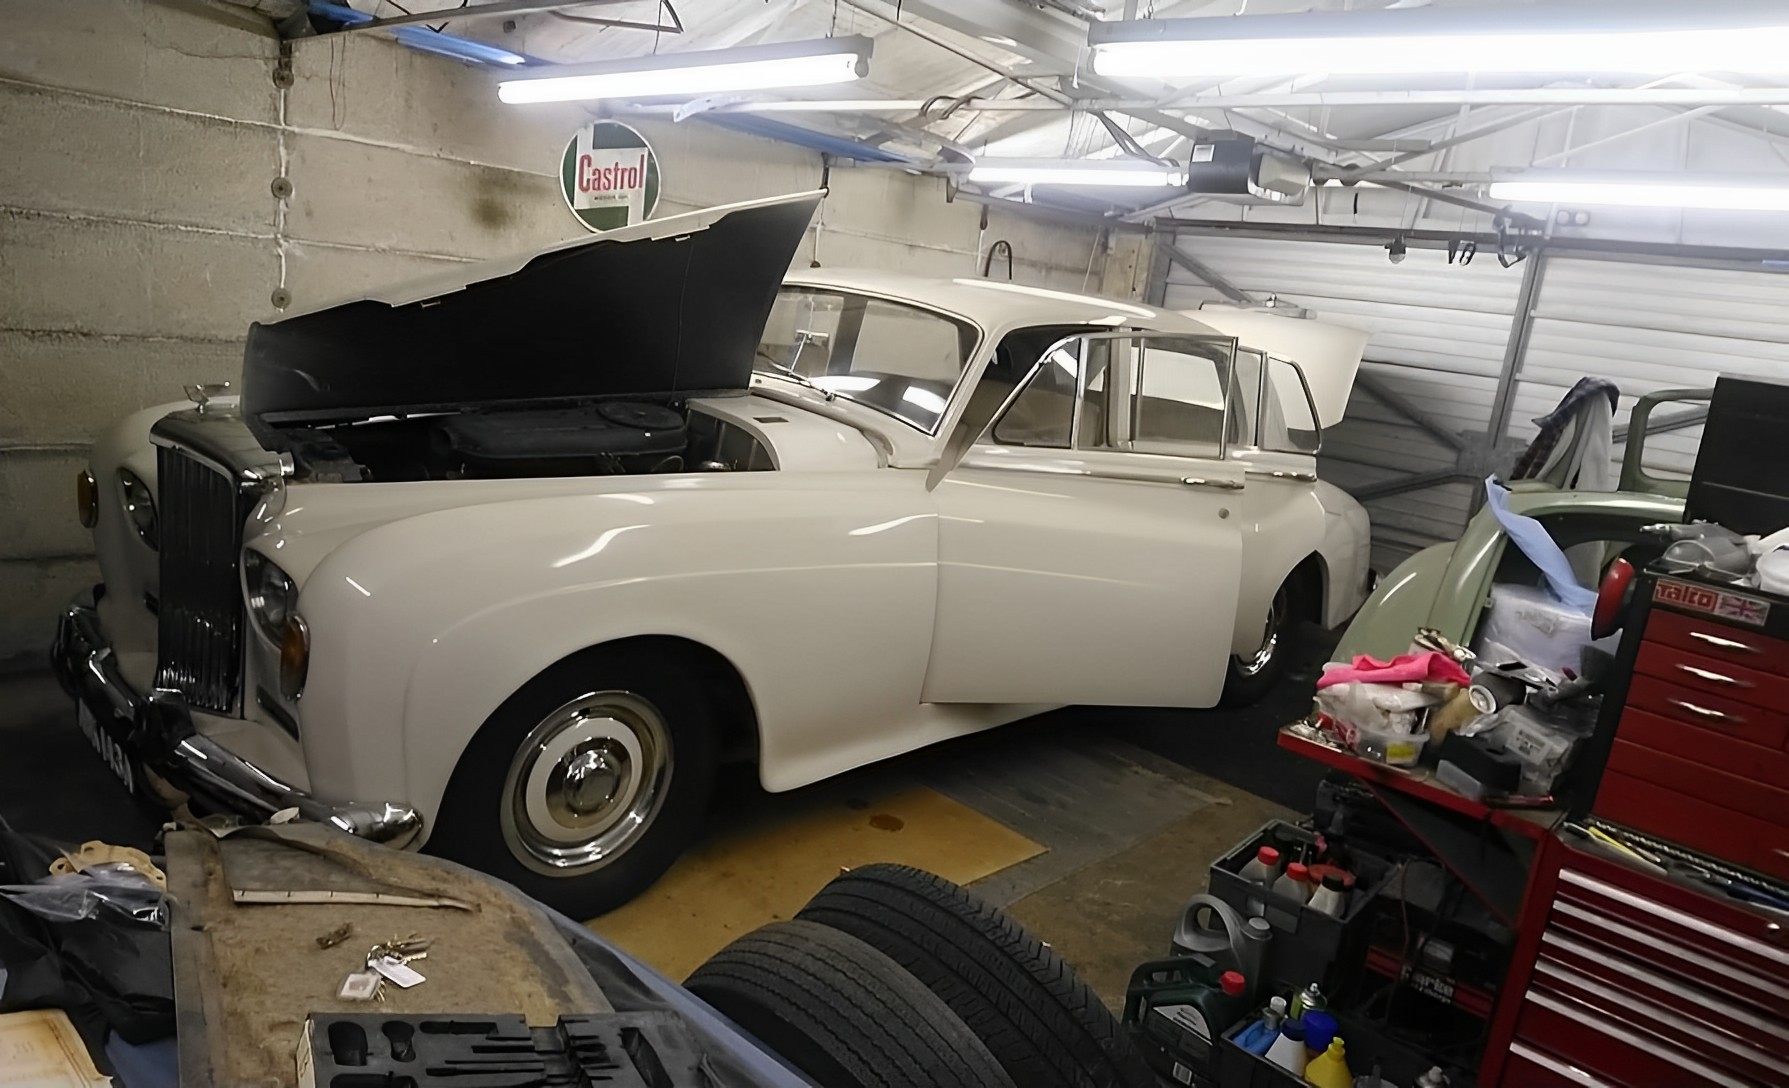
To safely weld the above, the fuel tank was removed giving me more work cleaning and undersealing the body behind it and cleaning the fuel tank inside and out then also painting it black its now waiting to go back in.
At this point I wanted something reasonably easy to do so I purchased some leather and set about making some spring gaiters having cleaned and greased the springs.
Then as the all-wheel brake cylinders had been cleaned and re-built with new seals, I decided that the brake master cylinders really ought to have the same treatment, so they were removed stripped cleaned and rebuilt with new seals and new copper pipes made to replace the old ones. I noticed the brake master cylinder support plate had been adjusted in the past so one of them had to be sourced. I am still deciding if I should use Silicone brake fluid when it is filled up again.
Once again, I wanted something easy to do so I replaced the sound deadening behind, and under the rear seat it was noticed the cloth on the rear parcel shelf was a bit moth eaten and had suffered when the window seal had leaked in the past so that was taken out and recovered with original style wool cloth obtained from Flying Spares (the rear screen had been taken out and replaced with a new seal a few weeks previously. The previous owner had worked on the interior and not much else inside needed doing, I would like to re-lacquer all the interior wood at some point in the future.
All five wheel rims were also cleaned and painted black. I would also at some point in the future return it to its original body colour of Antilope and put more suitable tyres on it as the new ones put on by the previous owner are really meant for SUVs.
This is an on-going project that I am hoping to have on the road later this year."
In conclusion, there's nothing quite as satisfying as witnessing a customer restoration project come to life. Seeing the transformation from a neglected or damaged Rolls-Royce or Bentley back to its former glory is inspiring.
That's why we always aim to provide the highest quality products and services to ensure that every restoration project is a success.
(Credit: Peter Richardson)
If you have a restoration project that you'd like to share with us. Please send us your project details and photos at Marketing@flyingspares.co.uk. We look forward to hearing about and sharing the amazing restoration projects that our customers have undertaken!


10 May 2023
10 May 2023